This post may contain affiliate links. Read Simple Veganizer disclosure policy.
These Vegan Homemade Peanut Butter Granola Bars are the perfect solution for anyone seeking a quick, nutritious treat.

They are easily prepared with simple and wholesome ingredients. These bars are excellent snacks for busy people on the go.
They’re entirely oil-free, gluten-free, soy-free, dairy-free, and egg-free, so they’re free from common allergens and unnecessary additives like commercial ones.
Sweetened naturally with dates and maple syrup, they offer a delightful taste without the guilt. Enjoy the simplicity and goodness in every bite!
Years ago, I discovered a granola bar recipe in Annie Markowitz’s “Whole Food Vegan Baking Book.” It inspired me to make it at home, adapting it to use ingredients readily available in my kitchen and to suit my family’s taste preferences. Now, I’m excited to share my version of that recipe with everyone.
Once you experience how easy and healthy it is to make granola bars at home, you’ll never feel the need to buy them from the grocery store again!
HOW TO PREPARE THESE EASY PEANUT BUTTER GRANOLA BARS
(Please scroll down to read the printable recipe card below for detailed ingredients, measurements, steps, and notes).
This recipe is a dream come true for anyone looking for a quick, nutritious snack. It’s vegan, requires no baking skills, and is packed with natural, wholesome, and easy-to-find ingredients.
To prepare these Easy Peanut Butter Granola Bars, mix natural peanut butter, maple syrup, and applesauce in a saucepan, then combine this mixture with oats, dates, and seeds.
Press the mixture firmly into a lined baking dish and bake until golden brown. Once cooled, optionally drizzle with a simple cocoa-maple syrup blend, then cut into bars and enjoy!
And that’s it!
Now, let’s explore kitchen tools, the required ingredients, possible substitutions, and the steps with helpful pictures if needed.
USEFUL KITCHEN EQUIPMENT
To prepare these delicious Peanut Butter Granola bars, you’ll need a few essential kitchen tools:
- 8×8 Baking Dish/Pan: Ideal size for the right thickness and even baking of the bars.
- Parchment Paper: Prevents sticking and allows easy removal of bars from the dish.
- Large Saucepan: Needed for combining and melting the wet ingredients evenly and mixing in the dry ingredients.
- Cutting Board: Offers a stable surface for cutting the bars neatly.
- Sharp, Non-Serrated Knife: Ensures clean and precise cuts for well-shaped bars.
Super simple. Now, let’s review the list of ingredients and potential substitutions in some cases.
INGREDIENTS NOTES

Here is a list of everything you will need to prepare this delicious recipe:
- Natural Peanut Butter: Provides a creamy base and a rich, nutty flavor while acting as a binding agent for the bars. You can substitute for any variety of nut butter or seed butter, such as almond butter, cashew butter, or sesame or sunflower seed butter. Keep in mind that the flavor profile and consistency of your granola bars will change based on the substitute you choose.
- Maple Syrup: Serves as a natural sweetener, adds moisture, and helps to bind the ingredients together.
- Unsweetened Applesauce: Adds natural sweetness and moisture without additional fats or oils. See my recipe here.
- Pure Vanilla Extract: Enhances the overall flavor profile of the bars with its warm, aromatic essence.
- Pinch of Salt: Balances the sweetness and brings out the flavors of the other ingredients.
- Old-Fashioned Rolled Oats: Acts as the primary structure for the bars, providing a chewy texture and wholesome, whole-grain goodness. I’m using Organic and Gluten-Free varieties.
- Chopped Dates: Offer natural sweetness and a chewy texture, contributing to the bars’ overall flavor and structure.
- Chopped Peanuts: Add a delightful crunch and extra protein, enhancing the nutty flavor.
- Raw Pumpkin Seeds: Contribute a subtle crunch and are a great source of minerals and healthy fats.
- Chia Seeds (or Ground Flax Seeds): Serve as a nutritional powerhouse, adding fiber, protein, and omega-3 fatty acids while helping bind the mixture.
Optional Chocolate Drizzle:
- Unsweetened Cacao Powder: Provides a rich chocolate flavor, making the bars more indulgent.
- Maple Syrup: Sweetens the chocolate drizzle without the need for refined sugar.
DIRECTIONS WITH PICTURES
Steps to make these Easy Peanut Butter Granola Bars:
Preparation: Preheat the oven to 350°F (180°C) and line an 8×8 square dish with parchment paper.
Melting Base Ingredients: In a saucepan, gently melt peanut butter, maple syrup, and applesauce until smooth.


Mixing Ingredients: Off the heat, stir in vanilla and salt, then fold in oats, dates, peanuts, pumpkin seeds, and chia seeds until evenly coated.


Forming Bars: Press the mixture firmly into the lined dish, creating a uniform layer.


Baking: Bake for 15-20 minutes until the edges are golden and a toothpick comes out clean from the center.


Cutting: Let the bars cool, then lift them out and cut into your preferred size and shape on a cutting board.


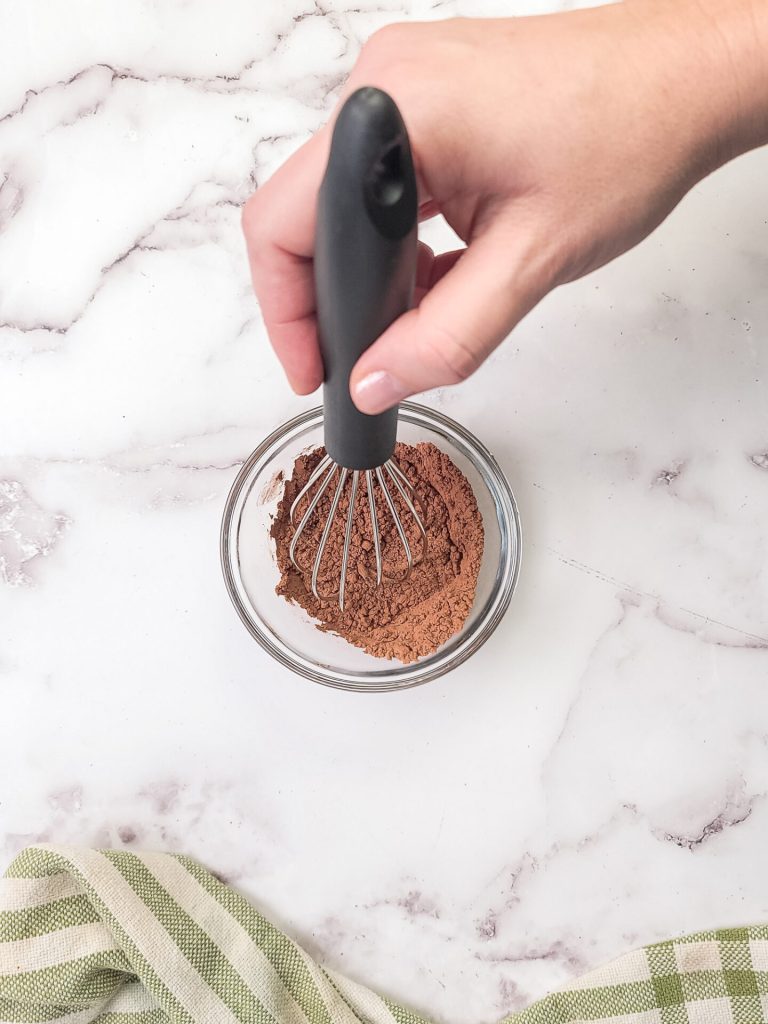
Adding Chocolate Drizzle (Optional): Mix cacao powder and maple syrup and drizzle over the bars. Allow it to set.


Serving: Enjoy your homemade, nutritious peanut granola bars!

What you’ll love about this recipe? Here are some reasons:
- Crispy Texture: Enjoy a satisfying crunch with every bite.
- Simple and Quick: Easy to prepare with minimal steps.
- Healthy Ingredients: Wholesome oats, nuts, and natural sweeteners.
- Customizable: Easily adaptable with your favorite mix-ins.
- Vegan and Gluten-Free Friendly: Suitable for various dietary needs.
These granola bars combine convenience, nutrition, and deliciousness all in one. Let’s make them!


WATCH THE STEP-BY-STEP VIDEO!
Remember to subscribe to my YouTube Channel so you can catch all of the weekly recipe videos!
PRINTABLE RECIPE CARD

EASY PEANUT BUTTER GRANOLA BARS (Vegan and Gluten-Free)
Equipment
- 1 8×8 Baking Dish/Pan
- 1 Large Saucepan
- 1 Cutting Board
- 1 Non-Serrated Knife
Ingredients
- 1/3 cup peanut butter (natural, no added oil, salt, or sugar) *
- ¼ cup maple syrup
- ¼ cup unsweetened applesauce
- ½ tsp pure vanilla extract
- Pinch of salt
- 2 cups organic old-fashioned rolled oats (GF if needed)
- ¼ cup Medjool dates (chopped)
- 3 Tbsp peanuts (chopped)
- 2 Tbsp raw pumpkin seeds
- ¼ cup chia seeds (or ground flax seeds)
Chocolate Drizzle (optional):
- 2 Tbsp unsweetened cacao powder
- 3 Tbsp maple syrup
Instructions
- Oven Preheating and Dish Preparation: Preheat your oven to 350°F (180°C) and line an 8×8 square dish with parchment paper.
- Melting Ingredients: Melt peanut butter, maple syrup, and applesauce in a large saucepan over low heat. Stir until well combined and smooth.
- Combining Wet and Dry Ingredients: Remove the saucepan from heat, stir in vanilla extract, add a pinch of salt, and mix well. Then add rolled oats, chopped dates, chopped peanuts, pumpkin seeds, and chia seeds. Mix until well combined and coat everything evenly.
- Pressing the Mixture: Transfer the mixture to the lined baking dish and press it down firmly to create an even layer.
- Baking the granola bars: Bake in the preheated oven for about 15-20 minutes** or until the edges turn golden brown, and if inserted, a toothpick comes out clean into the center.
- Cutting the Bars: Remove the dish from the oven and let the granola bars cool. Then, lift the parchment paper to remove the entire slab from the baking dish. Place it on a cutting board and carefully cut the slab into bars***. You can decide on the size of the bars based on your preference – either into squares or traditional bar shapes.
- Preparing and adding the Chocolate Drizzle (optional): prepare the chocolate drizzle. Mix the cacao powder and maple syrup in a small bowl until smooth. Drizzle the chocolate mixture over the bars using a spoon or a piping bag. Let it cool for harden the chocolate.
- Serve and enjoy your peanut granola bars!
Notes
- * Ensure your peanut butter has a creamy consistency to avoid dry bars.
- ** Start checking the bars in the oven at 14 minutes, keeping in mind that all ovens are different, and they can be ready before.
- ***It is important to allow the bars to cool completely before cutting them. Use a sharp, non-serrated knife to press into the bars instead of dragging it when cutting.
- Pressing the bars firmly to compact the mixture so the bars don’t fall apart is crucial.
- To store homemade peanut granola bars, keep them in an airtight container and refrigerate for up to two weeks for longer freshness. For extended storage, freeze individually wrapped bars for up to three months and thaw at room temperature or in the refrigerator before consuming. Use parchment paper between bars to prevent sticking, especially if they have a chocolate drizzle.
- The recipe was adapted from the book Whole Food Vegan Baking: Delicious Recipes Using Healthy, Natural Ingredients.
WAYS TO ENJOY THESE BARS
Here are some enjoyable ways to incorporate these Easy Peanut Butter Granola Bars into your routine:
- Quick Breakfast: Grab a bar on busy mornings for a nutritious start to your day.
- Healthy Snack: Perfect for mid-afternoon cravings, providing sustained energy without a sugar crash.
- Post-Workout Treat: Refuel with a bar post-exercise, thanks to its balance of carbs, protein, and healthy fats.
- Lunchbox Addition: A great snack for kids’ lunchboxes, offering a healthier alternative to store-bought snacks.
- On-the-Go: Ideal for hiking, road trips, or as a travel snack due to their portability and non-messy nature.
- With a Cup of Tea or Coffee: Enjoy a bar as a light, sweet complement to your favorite hot beverage.
If you want to try more sweet treats, check out these recipes:

DID YOU MAKE THESE PEANUT BUTTER GRANOLA BARS?
Please leave a comment below, share it, or rate it.
Follow Simple Veganizer on INSTAGRAM. Tag @simpleveganizer, and hashtag it #simpleveganizer. I’d love to see your creations!
You can also FOLLOW ME on FACEBOOK, PINTEREST, and SUBSCRIBE to my YOUTUBE channel.


1 thought on “EASY PEANUT BUTTER GRANOLA BARS (Vegan and Gluten-Free)”