This post may contain affiliate links. Read Simple Veganizer disclosure policy.
Learn how to make soy milk at home with this step-by-step guide. This dairy-free milk alternative is so simple to make with just two ingredients—soybeans and water—and a few straightforward steps. With this recipe, you can easily create fresh soy milk, perfect for lattes, smoothies, oatmeal, baking, or simply savoring on its own.

Since adopting a vegan lifestyle, soy milk has become one of my favorite plant-based alternatives to dairy milk. It adds a refreshing flavor to my tea or coffee and is perfect for baking and cooking. However, some store-bought brands contain additional ingredients that I don’t like, and the ones that contain only soybeans and water are not easily available.
So, when I took the Fork Over Knives Ultimate Cooking Course and learned how to make several plant-based milks, I decided to make my own milks at home. It’s easier, fresher, and healthier.
Having shared the recipes for Oat Milk and Soy Milk, I’m excited to continue offering homemade plant-based milk recipes to you. Soon, I will share more options so anyone with allergies to some of the ingredients in those options can have better alternatives.
And talking about allergies, homemade soy milk is a fantastic option for those with dietary restrictions. It’s naturally free from common allergens such as lactose, gluten, and nuts, making it a safe and inclusive choice for many.
Let’s dive into why this delightful beverage should be your next kitchen adventure.
WHY SOY IS SUPER FOR YOU
Soybeans are a powerhouse of nutrition, packed with high-quality protein, essential fatty acids, vitamins, and minerals. Incorporating soy milk into your diet is a fantastic way to boost your intake of nutrients like iron, calcium, and magnesium while also getting a good dose of plant-based protein.
Plus, soy contains isoflavones, known for their antioxidant properties and potential benefits in reducing the risk of various health issues.
Opting for organic soybeans can elevate the health benefits even further. Organic beans are grown without the use of synthetic pesticides or fertilizers, which means your homemade soy milk will be free from these unwanted chemicals. This choice supports not only your health but also the health of the planet, promoting sustainable farming practices.

ORIGINS OF SOY MILK
Soy milk originated in China during the early Han dynasty (202 BC – 220 AD), primarily as a byproduct of tofu production.
It has been a staple in East Asian diets for centuries, valued for its high protein content and versatility.
Over time, its popularity spread globally, especially among those seeking dairy-free alternatives due to dietary restrictions or environmental concerns. Today, soy milk is widely consumed worldwide and is available in various flavors and fortified forms.
HOW TO MAKE SOY MILK AT HOME
(Please read the printable recipe card below for detailed ingredients, measurements, steps, and notes).
Whether you’re a seasoned vegan pro or simply curious about exploring plant-based options, this recipe is perfect for you. With minimal ingredients and clear instructions, you’ll have soy milk in no time!
Start by soaking 1 cup of yellow organic soybeans overnight, then rinse and drain.
Boil the soybeans for 15 minutes to reduce the bitter (beany) taste. Then, blend them with water and simmer to enhance flavor.
Strain through cheesecloth, flavor to taste if desired, and store in the refrigerator for fresh, homemade soy milk.
And that’s a high-level summary; now, let’s explore kitchen tools, the required ingredients, and the steps with helpful pictures if needed.
USEFUL KITCHEN EQUIPMENT
Here’s what you’ll need to make your plant-based milk:
- Blender: To puree the soaked and softened soybeans into a creamy liquid.
- Large Bowl: For soaking the beans.
- Cheesecloth or Nut Milk Bag: This is used to strain the milk and ensure it’s silky and smooth.
- Pot: For cooking the milk, which enhances its taste and digestibility.
Now, let’s review the list of ingredients.
INGREDIENTS NOTES

Here is a list of everything you will need to prepare this fresh plant-based milk:
- Dried Yellow Organic Soybeans: The base ingredient for soy milk. Yellow soybeans are ideal for their mild flavor and creamy texture. Organic ensures the absence of pesticides and GMOs, aligning with healthier and more environmentally friendly practices. Rinse them and discard any dark or discolored beans.
- Water: Used for soaking and blending the soybeans. It helps extract the nutrients and flavors from the beans to form the milk. Additional water is used during cooking to achieve the desired consistency and improve digestibility.
- Optional Sweeteners (like Maple Syrup) or a Pinch of Salt: These are used to enhance the flavor of the soy milk. These are optional and help balance this milk’s subtle beany flavor.
DIRECTIONS WITH PICTURES
To make soy milk at home, follow these steps:
Soak the Soybeans: Place the soybeans in a large bowl and cover with water. Soak overnight to soften them. They will double in size.


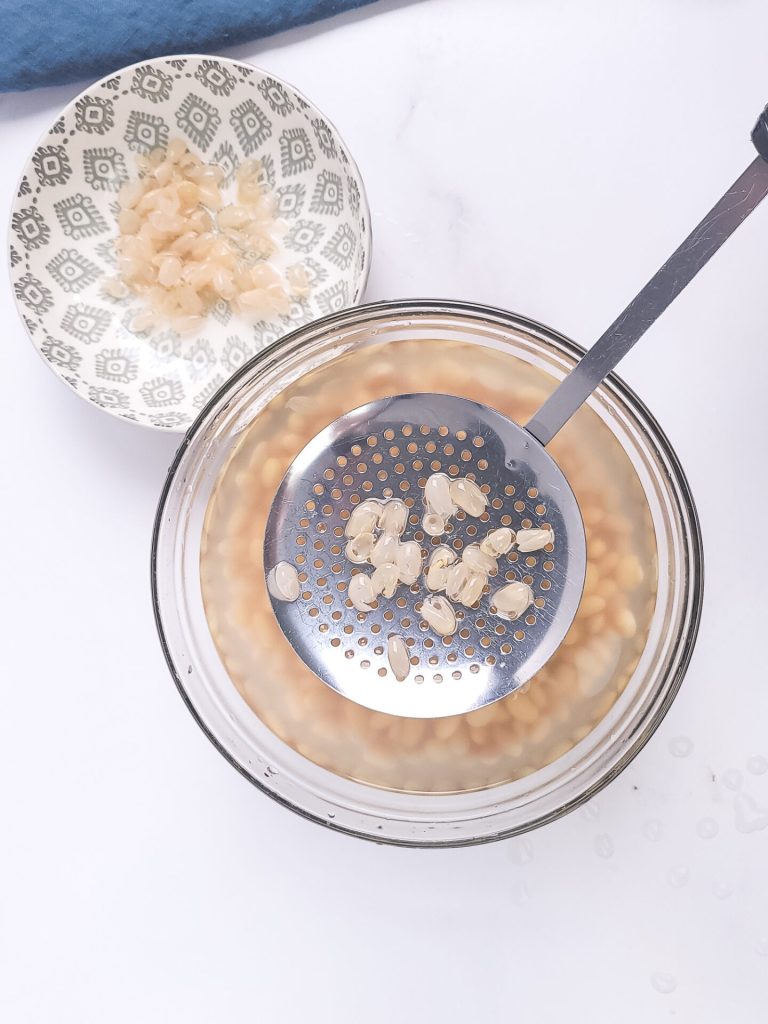
Drain and Rinse: Thoroughly rinse the soaked beans under cold water. Optionally, remove loose skins.

Boil the Soybeans (Optional): Briefly boil the beans to lessen the beany taste.

Blend the Soybeans: Blend the beans with water until creamy.


Cook the Soy Milk: Cook the blended mixture in a pot, adding more water, bringing it to a gentle boil, and then simmering.


Allow to Cool Slightly: Let the milk cool, which makes it safer for straining.

Strain: Pour the milk through a cheesecloth or nut milk bag.


Flavor the Soy Milk (Optional): Enhance the milk with sweeteners or salt while it’s still warm. Then, let the milk reach room temperature before storing it in the fridge (save the okara, pulp, for future recipes; you can prepare these Veggie Burgers).


Enjoy your homemade soy milk!

WHAT WILL YOU LOVE ABOUT THIS RECIPE?
Here are several delightful aspects to love about this homemade recipe:
- Health Benefits: Homemade soy milk is packed with nutrients, including high-quality protein, essential amino acids, and isoflavones that offer various health benefits, such as supporting heart health and bone density.
- Customizable Flavors: This recipe allows personalization with optional sweeteners or flavors. Whether you prefer a hint of vanilla, a touch of sweetness with maple syrup, or simply a pinch of salt, you can tailor the soy milk to suit your taste buds.
- All-Natural and Pure: Making soy milk at home avoids the additives and preservatives commonly found in commercial brands, resulting in a purer, more natural product.
- Cost-Effective: Homemade soy milk can be more economical than store-bought options, especially if it is consumed regularly and soybeans are bought in bulk.
- Versatility in Use: This soy milk is incredibly versatile and can be used in various culinary applications, from drinking it straight to using it in smoothies, cereals, baking, or coffee.
- Dietary Inclusion: Perfect for vegans and those with dietary restrictions such as lactose intolerance or allergies to nuts and gluten, this soy milk is an inclusive alternative that everyone can enjoy.
Let’s prepare this homemade soy milk!

WATCH THE STEP-BY-STEP VIDEO!
Remember to subscribe to my YouTube Channel so you can catch all of the weekly recipe videos!
PRINTABLE RECIPE CARD

HOW TO MAKE SOY MILK AT HOME (Vegan, No special equipment)
Ingredients
- 1 cup organic soybeans (Dried yellow organic. Rinse well and discard any dark or discolored beans)
- 8 cups water (plus more for soaking and boiling)
- Sweeteners like maple syrup or a pinch of salt for taste (Optional)
Instructions
- Soak the Soybeans: Place the soybeans in a large bowl and cover with about 2-3 inches of water. Soak them overnight or for at least 8 hours (12 hours for best results). The beans will double in size and soften.
- Drain and Rinse: Drain and rinse the soaked beans thoroughly under cold water. Remove any beans that haven't softened properly. Optionally, remove the outer skin as much as possible.
- Boil the Soybeans (Optional): To reduce bean flavor, boil the soaked and rinsed soybeans in fresh water for 5-10 minutes before blending.
- Blend the Soybeans: Add the soybeans and 4 cups of water to a blender. Blend until smooth and creamy, about 1 minute on high speed.
- Cook the Soy Milk: Pour the blended mixture into a large pot. Add the remaining 4 cups of water. Heat over medium heat, stirring occasionally, until it comes to a gentle boil. Be careful as it can foam up quickly. Reduce heat to low and simmer for about 20 minutes*, stirring occasionally. Skim off any foam that form on the surface.
- Allow to Cool Slightly: Before straining, let the soy milk cool slightly in the pot for about 10-15 minutes. This will help prevent burns during the straining process and make handling the hot liquid safer.
- Strain: Strain the slightly cooled soy milk through a cheesecloth or a nut milk bag into another pot or a large bowl. Squeeze out as much liquid as possible. The leftover pulp (okara) can be saved for other recipes.
- Flavor the Soy Milk (Optional): After straining, while the milk is still warm, add your choice of flavoring such as maple syrup, vanilla extract, or a pinch of salt. Adjust the amount according to your taste preference.
- Cool and Store: Allow the soy milk to cool at room temperature. Once cooled, transfer it to a sealed container and refrigerate. Consume within 3-5 days for the best taste and freshness.
Notes
- *Cooking time: A longer, slower cooking process can help reduce the beany flavor, allowing more time for the volatile compounds to break down.
- The Total Time doesn’t include soaking time.
- Soaking Time: Soaking the soybeans for at least 8 hours is crucial as it softens the beans and ensures smoother milk. You can extend the soaking time to 12 hours for an even creamier texture.
- Removing Skins: While optional, removing the skins from the beans after soaking can reduce bitterness and improve your soy milk’s smoothness. This step can be a bit tedious, but it is worth it for finer quality milk.
- Blending Well: Blend the soybeans very well with water until completely smooth. A high-powered blender is best for achieving a creamy consistency without graininess.
- Straining Tips: Strain the mixture using Cheesecloth or Nut Milk Bag. Double straining might be necessary to remove all solids and achieve smoother milk.
- Flavoring: Plain soy milk may not be everyone’s taste due to its strong flavor. You can fix the beany taste with flavor. Adding flavors like maple syrup or vanilla extract can significantly enhance the taste of homemade soy milk. Introduce flavors after cooking so you can adjust to taste more accurately. If I’m using it for cooking, just a splash in my tea or smoothies, I’m not using additional flavors. However, If I drink it, I love adding some maple syrup and a pinch of salt.
- Storage: Store the soy milk in a clean, airtight container in the refrigerator to keep it fresh (3 to 5 days). Shake or stir it well before each use, as natural separation may occur.
- Using Okara: Don’t discard the soybean pulp (okara); it’s nutritious and can be used in various recipes, such as vegan burgers and cookies, or added to smoothies for extra fiber. I love making okara burgers at home! (Recipe here)
WAYS TO ENJOY THIS HOMEMADE PLANT-BASED MILK
Homemade soy milk is incredibly versatile and can be enjoyed in numerous delicious ways. Here are some creative ideas on how to incorporate it into your daily routine:
- Straight Up: Enjoy your freshly made plant-based milk chilled from the fridge. It’s refreshing, hydrating, and an excellent alternative to dairy milk.
- Coffee and Tea: Use it as a creamer in your coffee or tea. Soy milk pairs especially well with matcha and black tea, giving a smooth, creamy texture.
- Breakfast Cereals: Pour it over your favorite cereal or granola. It’s a nutritious start to the day, adding a creamy consistency and a touch of sweetness if you’ve flavored your milk.
- Smoothies: Blend it with fruits and vegetables for a power-packed smoothie. It’s an excellent base that complements various smoothie ingredients.
- Cooking and Baking: Substitute this plant-based milk for dairy milk in recipes like pancakes, muffins, or even savory dishes like creamy soups and sauces. It adapts well to both sweet and savory contexts. I love soy milk for cooking!
- DIY Yogurt: Try making your own soy yogurt at home. It’s simple, and with the right starter culture and a bit of patience, you can produce delicious, probiotic-rich yogurt.


Самые важные новости моды.
Важные новости самых влиятельных подуимов.
Модные дома, бренды, haute couture.
Лучшее место для трендовых людей.
https://rftimes.ru/news/2024-08-14-7-samyh-kultovyh-veshchey-ot-balenciaga
I made this and it turned out just a touch watery. I would use a cup less water. The cheesecloth thing took forever so I gave up on that and basically ended up just straining it through a regular strainer. I added about 3 tablespoons of vanilla and 2 tablespoons of pure maple syrup. It was time consuming but I’m glad I tried it and will continue to perfect it. Thank you for your recipe. *note I used artificial vanilla.
Thanks for trying the recipe and sharing your experience! Straining with a regular strainer was a great workaround, and your addition of vanilla and maple syrup sounds fantastic (it’s the way I love mine, plus a pinch of salt). Adjusting the water slightly next time should help with the texture you like. Appreciate your feedback! 😊